There are more similarities between free, consumer Gmail and Google Workspace than there are differences. In fact, Google Workspace can be viewed as a multi-user version of consumer Gmail.
When a single-user platform becomes multi-user, an administrative level is needed for tasks such as adding and deleting users, creating groups, assigning apps, and managing security.
Fortunately, adding users to Google Workspace is a straightforward process for an admin. The creator of a Google Workspace account is a super administrator by default. One or more admin roles can optionally be assigned to any user. One of the admin roles is called User Management Admin. This role allows a user to create, delete and update individual users (other than admin users).
Only a super administrator, however, can bulk upload new users.
Step 1
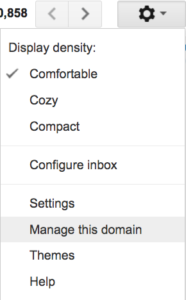
Go to the admin console at http://admin.google.com. You can also navigate to the console from within Gmail by clicking on the gear icon and selecting Manage This Domain.
Step 2
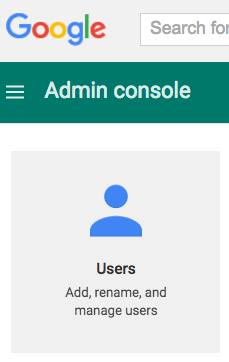
In the Admin Console, click on Users.
Step 3
Click on the plus sign in the upper left. You will have the option to add multiple users (via .CSV upload) or add a single user. Click on the icon next to Add new user.
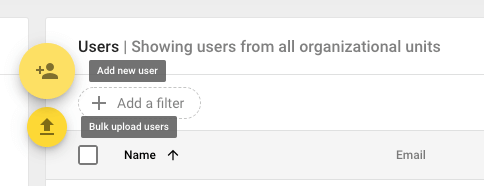
Detailed instructions on uploading multiple users can be found here.
Step 4
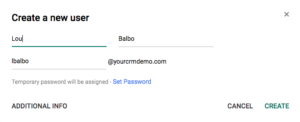
In the Create new user dialog, enter the user’s first name, last name, and email address prefix. A temporary password will be automatically created. A password can also be manually created.
Step 5
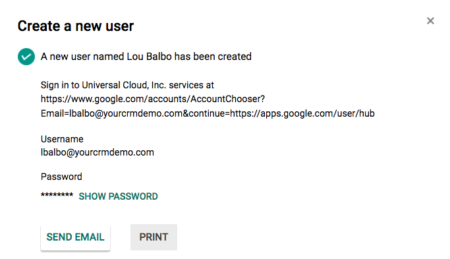
Email the instructions to the new user, print them, or verbally provide the user with the URL, username, and password.
Step 6 (Optional)
Give the user access to any Google Workspace services aside from the basics. Add the user to any Groups they should be a part of. Add email address aliases for the user.


